
Parzûnek li aquariumek bi kurmek guhê sor: hilbijartin, sazkirin û bikar anîn

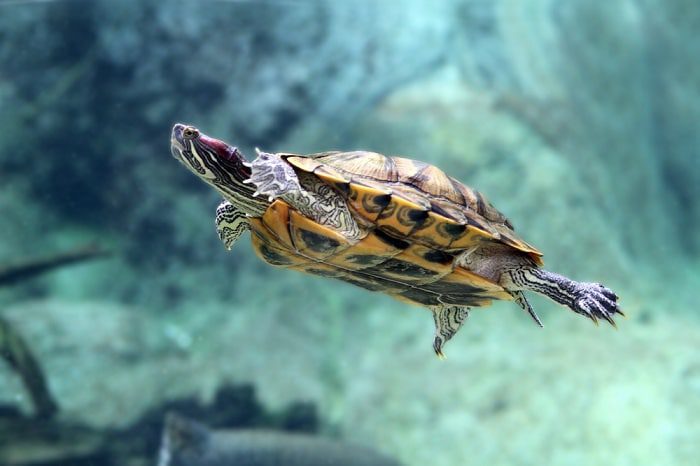
Rapid water pollution is an inevitable problem when keeping red-eared turtles. These pets eat protein food, the remains of which soon deteriorate in the water, but the main difficulty is the abundant waste of reptiles. To reduce the level of pollution, the water in the aquarium must be constantly filtered using special equipment. Finding a water filter is easy at any pet store, but not all of them are suitable for a red-eared turtle terrarium.
Contents
Amûrên navxweyî
Aquarium filters are divided into internal and external. The design of the internal is a container with slots or holes in the walls for the passage of water. An electric pump located on top drives water through the filter layer. The body is attached to the wall of the terrarium vertically or installed horizontally on the bottom. Such a device is very convenient to use as a turtle filter, where the water level is usually low.

Internal filters are of the following types:
- mechanical – the filter material is represented by an ordinary sponge, which must be replaced regularly;
- chemical – has a layer of activated carbon or other absorbent material;
- biological – bacteria multiply in the container, which neutralize pollution and harmful substances.
The bulk of the filters on the market combine several options at once. Decorative models with an additional cleaning function are common. An example is the spectacular waterfall rock that adorns the terrarium and constantly drives large volumes of water through the filter inside.

The turtle island with filtration is very convenient for small terrariums where there is no room for additional devices.

External Filters
The disadvantage of internal structures is low power – they can only be used for containers up to 100 liters in volume, where growing turtles are usually kept. For adult pets, it is better to install an external filter with a powerful pump. Such a device is located next to the aquarium or attached to its outer wall, and two tubes are lowered under the water to drive the water.
There are many advantages to this design:
- there is more free space for swimming in the aquarium;
- the pet will not be able to damage the equipment or get injured with it;
- the large size of the structure allows you to install a motor and arrange several compartments with absorbent material for multi-stage cleaning;
- high pump pressure creates a flow effect in the terrarium, preventing water from stagnating;
- such a water filter is easier to clean, it does not need to be rinsed entirely.
Due to their high power, external devices are the most suitable filter for the red-eared turtle aquarium. Such equipment copes well with pollution and is designed for containers with a volume of 150 liters to 300-500 liters, which usually contain adults.
IMPORTANT: Most designs have an additional aeration function to saturate the water with oxygen. Turtles do not have gills, so they do not need aeration, but some types of beneficial bacteria can only live and reproduce in the presence of oxygen in the water. Therefore, all biofilters are usually equipped with an air outlet.
In order not to make a mistake with the choice, it is better to buy a filter for a turtle aquarium, designed for a larger volume. So for a capacity of 100-120 liters, it is recommended to install a filter of 200-300 liters. This is explained by the fact that the water level in a terrarium is usually much lower than in an aquarium with fish, and the concentration of waste and pollution is ten times greater. If you install a less powerful device, it will not cope with cleaning.
Sazkirina rast
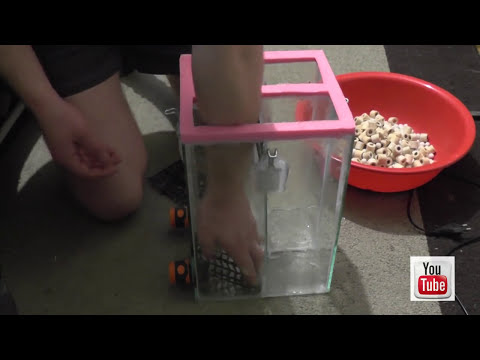
To install an internal water filter in an aquarium, you must first remove the turtles from it or transplant them to the far wall. Then you need to fill the aquarium at least half, lower the disconnected device under water and attach the suction cups to the glass. Some models use convenient magnetic latches or retractable mounts for hanging on the wall.
The filter can also be placed on the bottom, in which case, for stability, it must be gently pressed down with stones. The openings in the housing must be open to allow water to pass freely. Submersibles can often hum when placed in a terrarium with low water levels. This is not an installation error – you just need to increase the water level or set the container to the bottom. If the noise is still heard, it may be a sign of a breakdown.
Video: installing an internal filter in an aquarium
It is easier to install the filter of the external structure correctly – it is located on the outer wall using a special mount or suction cups or placed on a stand nearby. Two tubes for the intake and return of water must be immersed under water from different sides of the terrarium. The canister on the device is filled with water from the aquarium, after which you can connect the device to a power outlet.
IMPORTANT: Both submersible and external filters can hum. Sometimes, because of the noise, the owners prefer to turn off the filter in the aquarium at night. But doing so is not recommended – this increases the degree of pollution, and the lack of an influx of water with oxygen causes the death of bacterial colonies on the layer. In order not to turn off the equipment while sleeping, it is better to purchase a completely silent filter for an aquarium with aquatic turtles.
Lênêrîn û paqijkirin
The internal filter must be regularly washed and replaced. The degree of contamination can be determined by the pressure with which water exits the holes in the housing. If the flow strength decreases, it is time to wash the device. When cleaning for the first time, the sponge can be rinsed under running cold water and used again. Do not use hot water or detergents – they will kill the beneficial bacteria that multiply in the pores of the sponge, and chemical residues can get into the terrarium. If the throughput of the cartridge is greatly reduced, and the interlayer itself has changed shape, you will have to replace it with a new one.
It is usually necessary to wash the filter at least once every two weeks, but a complete cleaning is carried out only with severe contamination. In this case, the device must be disassembled and carefully rinsed all parts under running water. To remove plaque from hard-to-reach places, you can use cotton swabs. It is recommended to remove the impeller from the mechanical block once a month and remove traces of dirt from the blades – the life of the motor depends on its cleanliness.
The external filter is especially convenient because, due to the large volume of the layer, it is only necessary to rinse the canister once a month or less. The force of water pressure, as well as the presence of noise during operation of the device, will help determine the need for cleaning.
To wash the filter, you need to disconnect it from the mains, turn off the taps on the hoses and disconnect them. Then it is better to take the device to the bathroom so that you can disassemble it and rinse all compartments under running water.
Video: cleaning the external filter

Homemade device
To create suitable conditions for the turtle, it is not necessary to purchase a fairly expensive external filter – you can assemble it yourself.
This requires the following list of materials:
- pieces of plastic pipes, connecting cuffs and plugs;
- connecting insulating material (silicone or other sealant);
- faucets, fittings;
- thin rubber or flexible plastic hose.
For a homemade filter to work, you need an electric pump. You can take the pump from an old filter or purchase a new one from the parts department. Also, for the filter, you will need to prepare a filler – foam rubber sponges, activated carbon, peat. Ceramic tubes are used to evenly distribute water flows. You can buy ready-made filler at a pet store.
After preparing the materials, a sequence of actions is performed:
- A piece 20 cm long is cut off from the pipe – a hacksaw or a construction knife is used for work.
- Holes are made in the surface of the plugs for outgoing hoses and taps. All parts are mounted on fittings with rubber gaskets.
- After installing the fittings, all joints are coated with sealant.
- A plastic mesh cut in a circle is installed inside the bottom cover-stub.
- A pump is attached to the inner surface of the top plug. To do this, a hole is drilled in the cover for air exhaust, as well as a hole for the electrical wire.
- The bottom plug is hermetically screwed onto the pipe section, rubber seals are used.
- The container is filled in layers – a sponge for primary filtration, then ceramic tubes or rings, a thinner sponge (a synthetic winterizer is suitable), peat or coal, then again a layer of sponge.
- The top cover with a pomp is established.
- Water supply and intake hoses are screwed to the fittings, on which faucets are pre-installed; all joints are sealed with sealant.
You will have to clean such a home-made filter every few months – for this, the canister is opened, and the entire filler is washed under cold water. To turn the device into a biofilter, the peat layer must be replaced either with a special substrate, or porous expanded clay should be taken. The reproduction of bacteria will begin at 2-4 weeks of work; when cleaning, it is better not to wash the substrate layer so that the bacteria do not die. For the biofilter to work in the aquarium, you need to install aeration.
Video: several options for how to make a filter with your own hands
Water filters for a red-eared turtle aquarium
3.7 (74.4%) 25 votes


Hun her weha dikanin Like
Ewlekariya bingehîn dema ku bi terrarium û heywanên terrarium re dixebitin